

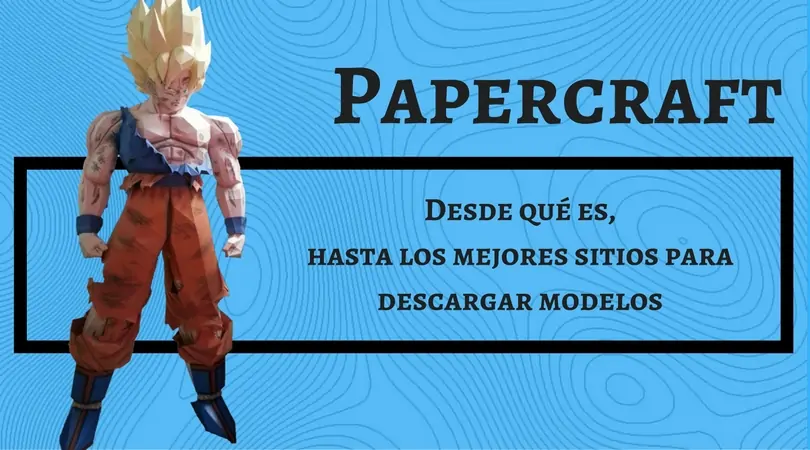
This article leaves a little of the usual, and that is that for once we are not going to talk about printers, but about things that can be done with them. No, we are not referring to getting boring Excel sheets or printing photos of the last holidays in Tenerife. Today we want to talk about a hobby that has more and more adepts and that has a fundamental role in printers: today we are going to talk about papercraft.
What is the papercraft
It is quite possible that you have done some papercraft work during
your childhood, although it is also quite possible that it is the first
time you see this word. Do you remember the scrapbooks with
which you could build castles, monuments and other architectural
paraphernalia armed only with scissors and a glue pot? Well, everything
evolves and thanks to the Internet this hobby has grown and evolved in a wonderful way.
Where before we could only make buildings and little else, now the
Internet provides us with infinity – and we say well, there are tens of
thousands – of papercraft models of all shapes and origins to be able
to create what you want in 3 dimensions. Do you want the characters in
your favorite video game? It is more than likely that you can find
them to perform using papercraft. Any character from cartoon series or
manga? There are kicked. Vehicles, animals, food, everyday
objects? Everything has its model in papercraft, including of course our
long-awaited monuments (believe us, when you see everything you can
do through papercraft you will forget the monuments very soon). The
best of all? It’s a hobby that provides dozens of hours of entertainment at a ridiculous price:
you only need ink to print the models downloaded for free from the
Internet, a series of very basic tools to cut and paste and a lot of
patience. We will leave patience aside for now and focus on all that is
needed to start creating models.
Tools needed
Internet and printer
The models are available for free on the Internet and soon after
searching papercraft on Google, dozens of web pages with
ready-to-download models will appear. However, so that you can go to
shot done we show you here a few perfect pages to find your first models :
Ca non papercraft : Great page to start, with a multitude of papercrafts of little complexity.
Papercraft Museum: Hundreds of models of all kinds.
Papercraft Square : Another great page with thousands of models available.
If finally we are going to make of this hobby something habitual also it is very convenient to throw of compatible cartridges so that each model does not become a bleeding of money in ink.
Cardstock
For papercraft to have a minimum structural integrity we must use paper with a higher grammage than usual in the folios. Using paper with a thickness like cardboard will suffice. A paper of 180 gr / cc will be ideal for most of the cases, but it is not necessary to be so specific: look to see what types of paper of higher weight have in your usual photocopying and do tests until you find the one that best suits you .
Craft blade

papercraft blade and crafts
Although you can use a cutter of the traditional (and to start may be better idea) at the end it is convenient to use a blade “scalpel” straight tip to make cuts to the paper with total precision. In North America they are called X-acto Knives but here you can find them in any craft store or even in Lidl-style supermarkets they usually take offers of this type of tools from time to time. The scissors are completely forbidden : they go very well to cut large external lines, but as soon as you get into detail they are useless. Also, as soon as you get used to using the blade you will go much faster than with any scissors.
Tool to mark
To make the folds we will mark the paper before so that it is folded exactly where we want it to be. We will help with a tool that “wear” the paper without breaking it: a blade of the previous ones that is already quite worn, a blunt punch or even a worn pen can be excellent tools. Of course, if you are going to use the pen, make sure before it is completely worn out!
Glue
With the typical white tail of crafts we will be perfect. Try not to buy “Chinese” glues, stick glues or “Imedium style”. Loctite and the like are completely prohibited!
Other
There are many tools and techniques that will make life easier when making advanced papercrafts, but this article being a mere approach to this hobby we assure you that with what we have offered you have more than enough to do many projects.
How to make a papercraft
Although advanced techniques are very necessary in case you want to make a papercraft complex or very bulky, for most models will be enough to print, mark, cut, fold and paste. If possible in this order if we do not want to end up with a paper ball in the trash …
Print has no greater mystery: we will simply download the model that has interested us from any of the previously mentioned websites (either in pdf, in jpg or in pepakura) and we will remove it by the printer. In this aspect the inkjet offers a much higher quality for what we want, since the ink penetrates the sheet of paper (heavier, remember) and when cutting this ink does not “crack” as it happens with the of lasers. This does not mean that we can not use laser printings, simply the impressions with traditional ink will be better.
Next we will mark the paper for the areas that will later have to be folded. These are marked by a series of dotted lines, which can come in two flavors :

In mountain (- – – – -). They are the most common , should be marked with the help of a ruler and the punch or tool that we have chosen directly above the drawing, for (once cut this) bend making a “mountain”, that is, the two parts of the drawing left on each side make “hillsides.”
In valley (- • – • -). Many of the models do not have this type of marks, but for those who have them they simply have to fold them “upside down”, in such a way that instead of a mountain the “slopes” of the drawing make a valley downwards. Being purists, you should mark the drawing on the unprinted part (behind the page) so that it looks good, but unless you are a papercraft professional (do they exist?) Simply mark them as the mountain ones and then turn towards the other side.
Later we will cut each piece of the model by straight lines, taking care not to cut by mistake the white “tabs” that we will use to stick the pieces together. As we have said it is convenient to use a blade or cutter instead of scissors. Next we will fold each piece by the previously made marks and we will be ready to paste.
When sticking the pieces you just have to look at how they are attached to each other and stick them with the white “eyelashes”. Most models that offer a minimum of complexity come with detailed instructions on how to glue the pieces together. At the time of applying the glue, use as little as possible of this: it will stick much earlier and there will be no need to clean “remains”. To do this, it is usually very good to use a toothpick to apply the glue, instead of directly from the bottle.
And that’s it! If we have applied correctly each dose of glue should dry in a few seconds and just go joining the pieces one by one until we have our model. As we have said previously there are techniques to make the papercraft look better (like painting the edges beforehand so you do not notice the white of the paper) but as a beginning this is enough and it is enough. There are very simple models that can be done in a short time and large and complex models that will take months to finish.
Pepakura
We could not leave this article on papercraft without mentioning that it is without a doubt the best program to create and print papercraft models: the Pepakura. This program (in its paid version Designer ) allows you to make models based on 3D images, although most of the people will suffice with their free version Viewer to be able to print and look at the models.
The advantage that Pepakura has (besides that some models are in this format and you will need it if you want to open them) is that each model can be rotated in 3 dimensions to see exactly how each piece is joined. It also has different options to be able to see edges, print the model with or without dubbing lines (more complicated but the model is much cleaner), see the model with or without textures … Without doubt a very useful program, especially for what it costs: zero. It also comes with some models preloaded and ready to print.
This is all! If in the end you end up interested in this magnificent (and terribly cheap) form of leisure do not forget to send us your work so we can admire them.
Advanced papercraft
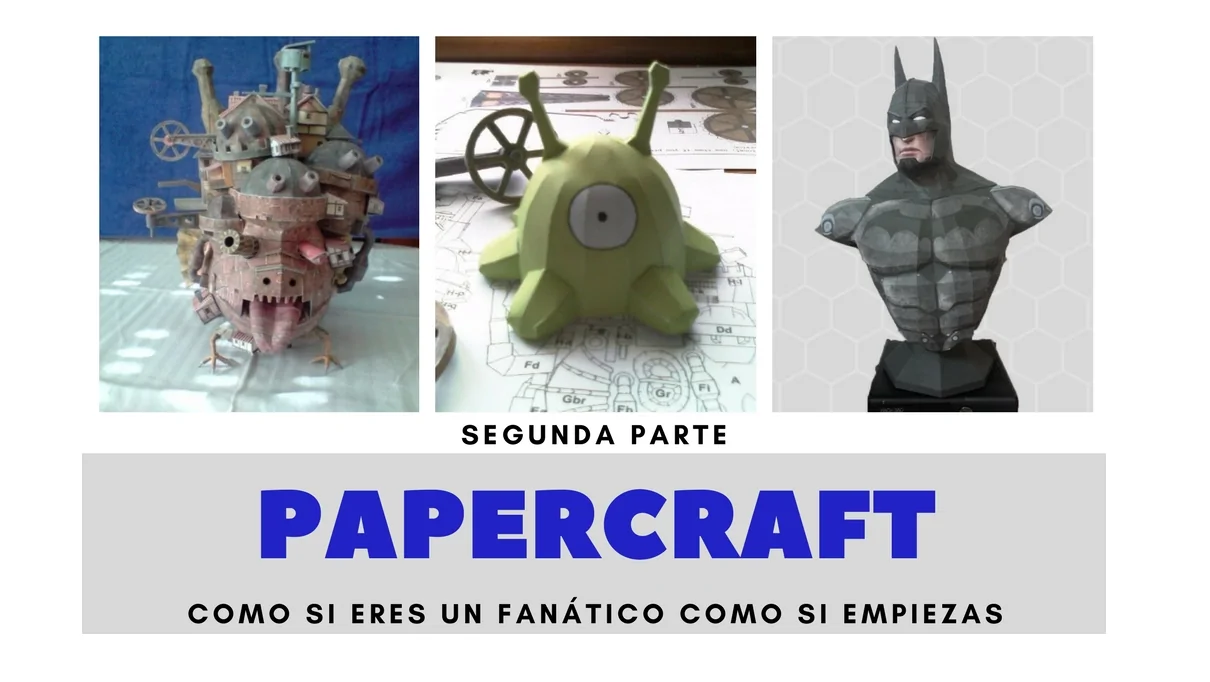
Did you like the previous papercraft article ? If so, you are in luck , because here you have your second part, with more tips and tricks so that your papercraft are the envy of friends, neighbors, architects and several sculptors. Of course, we warn that it is practically essential to have read the previous papercraft article so that you can approach the task with guarantees: we are going to assume that you already know all the basic techniques and materials and that you are prepared to face the most advanced techniques.
Example: a simple papercraft step by step
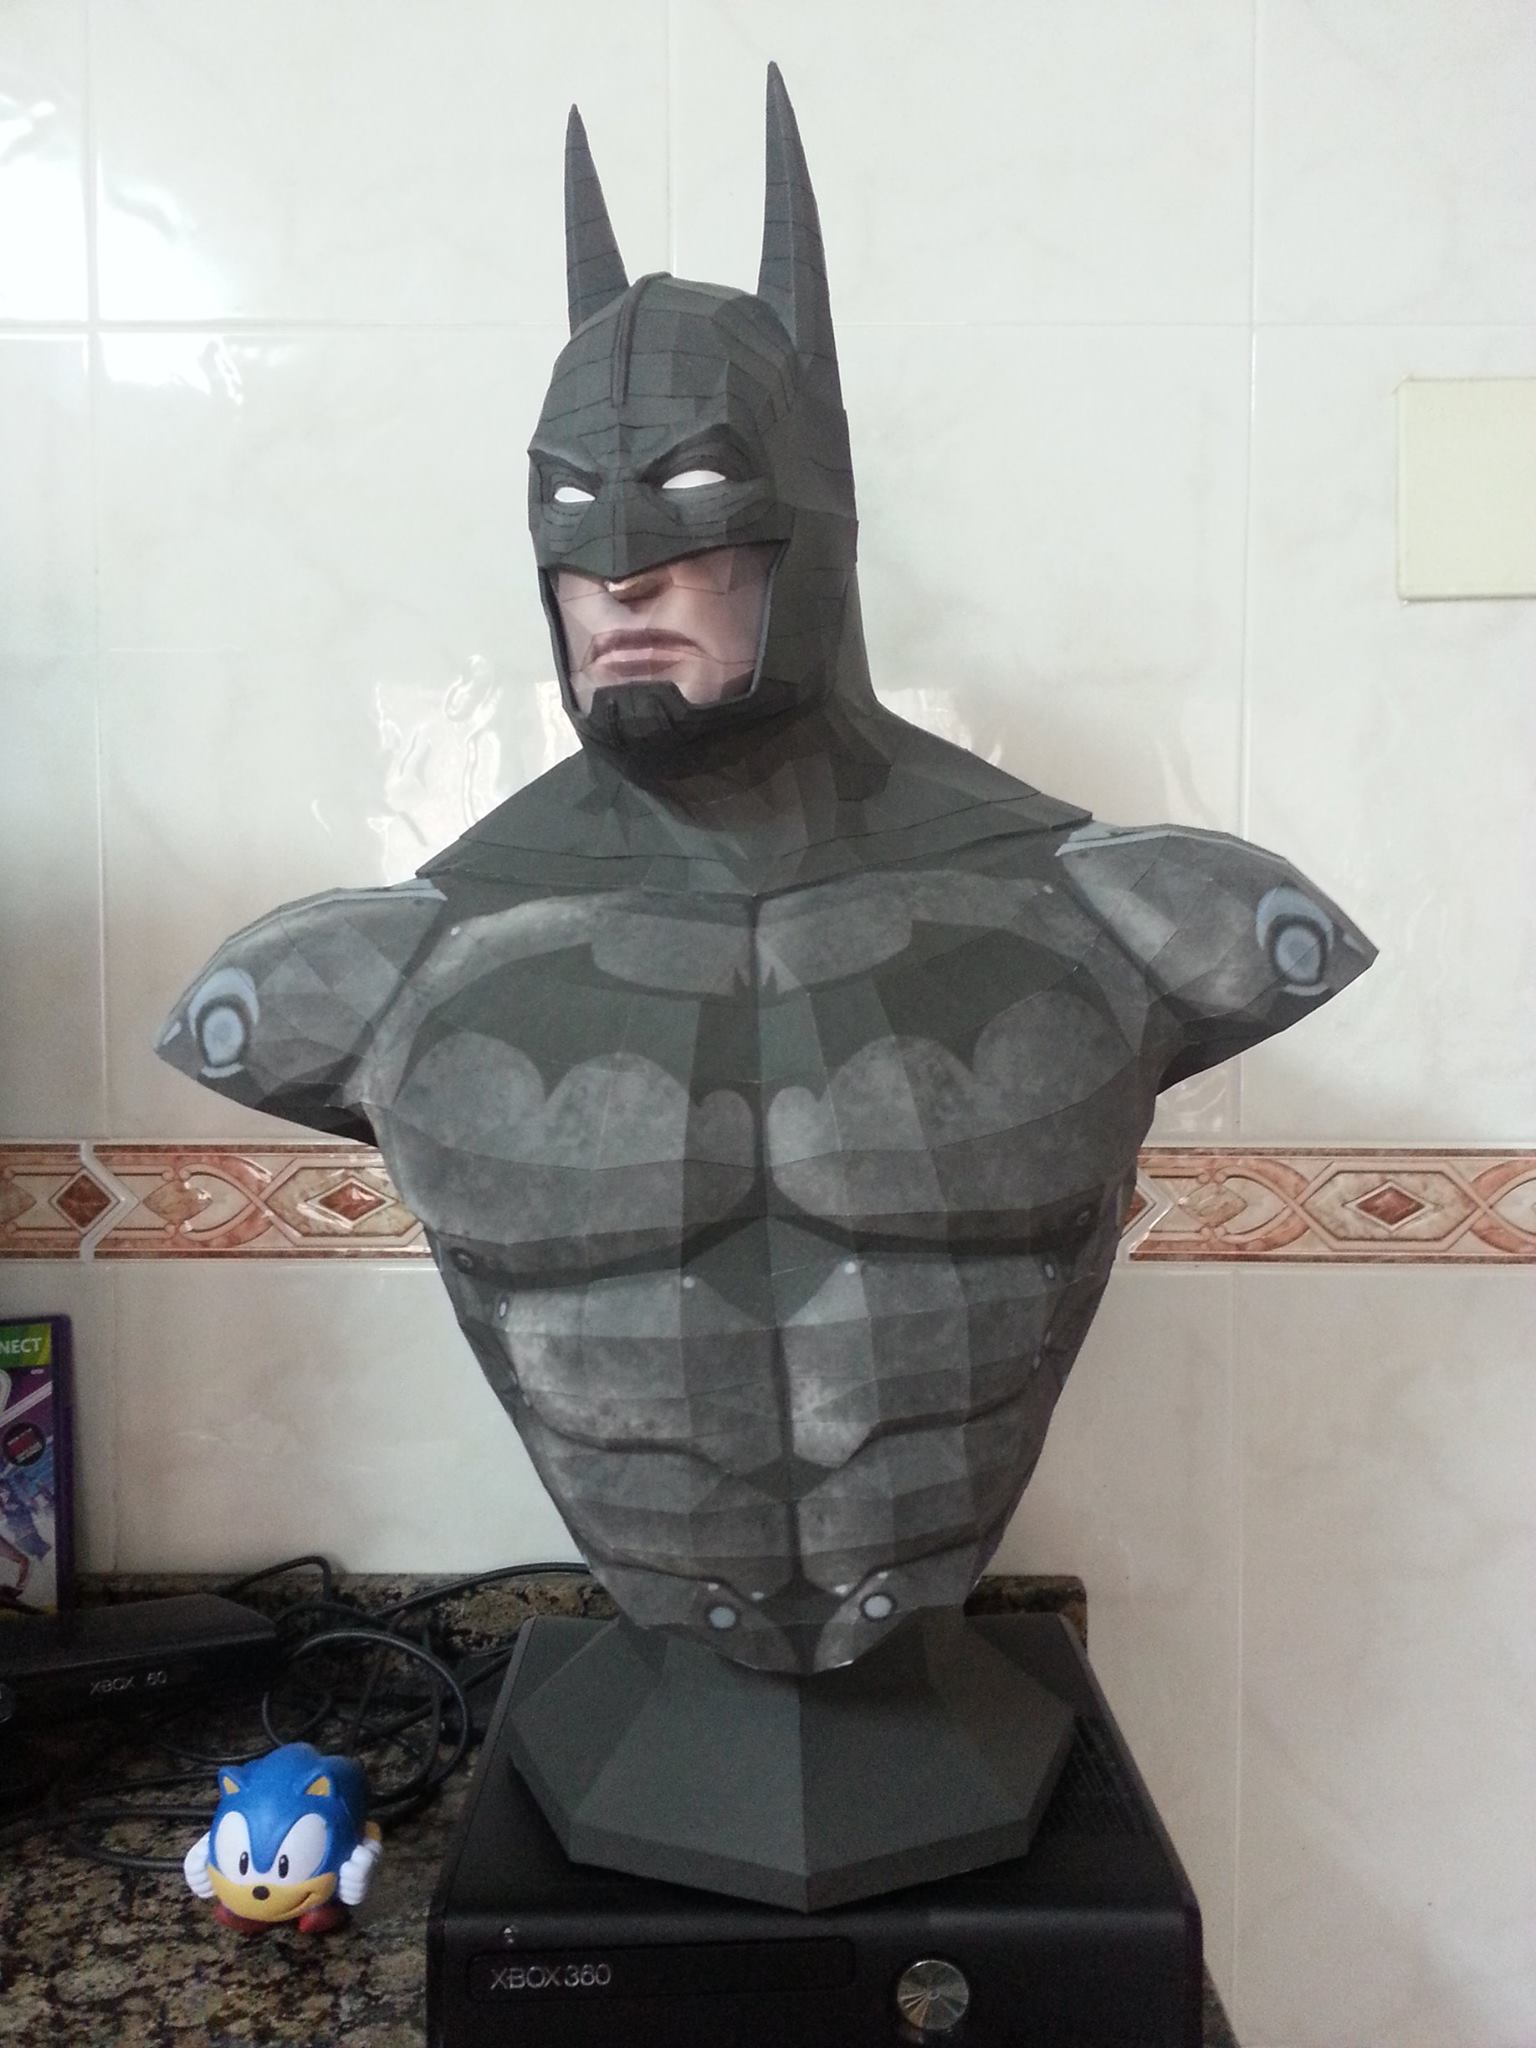
As there is nothing better to know well the techniques than to practice them we will see how to make a “simple” papercraft step by step. We emphasize the word “simple” since, although it does not require any special ability to do so, the final finish will be very noticeable depending on the technique since the papercraft in question contains several rather small pieces. We have chosen a bust of Batman because it is impressive in any environment “geek”, because it takes just a couple of weeks at a quiet pace to perform and because being mostly black-black is easier to disguise the joints between pieces pulling marker pen.

Seeing the model in question begin with the eyes, since they are the areas with the largest number of tiny pieces. It will require large doses of patience and skill, but it is better to start here for two reasons: first it will be easier to join later larger pieces and, second, we can decide to make another model more affordable if we despair too much with this without having lost too much time. We will mark and cut separately the pieces of each eye, we will revise the edges with black marker so that the white of the leaf is not seen and we will be joining with the minimum amount of glue the pieces. We can help with hair removal tweezers to hold the pieces if we consider it necessary.
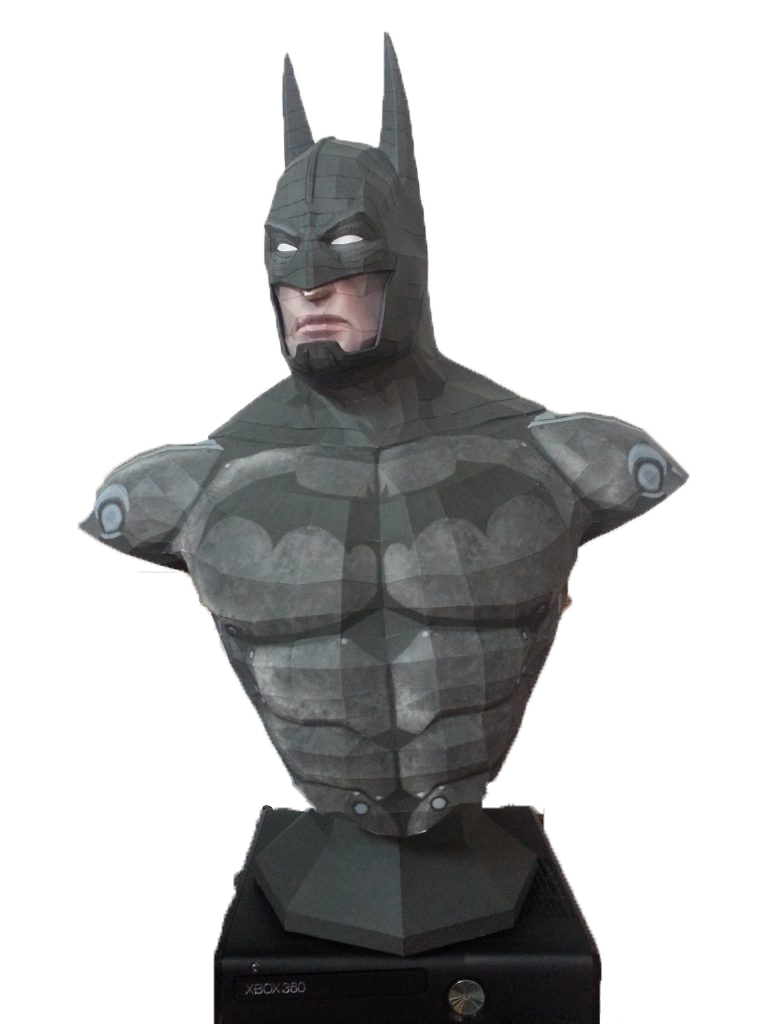
Una vez hechos los ojos el resto vendrá rodado. Iremos construyendo la cara alrededor de los mismos, recordando siempre pintar de manera previa las piezas. Las piezas más grandes se pueden montar aparte y unir posteriormente al conjunto, asegurándonos siempre antes que nos van a caber los dedos a la hora de hacer presión entre las piezas. Ante la duda siempre será mejor ir pegando las piezas una a una al conjunto inicial.
When we begin the flesh-colored part of the face or the gray of the chest, we will stop using the black marker and begin to paint the edges with wood paints . Using markers with any color other than black will make the final model more noticeable the unions than if we had left blank. Batman finished! It has not been so complicated, right?
Example: an advanced papercraft step by step
You know Howl’s traveling castle, we put the trailer to give you an idea of what we are talking about.
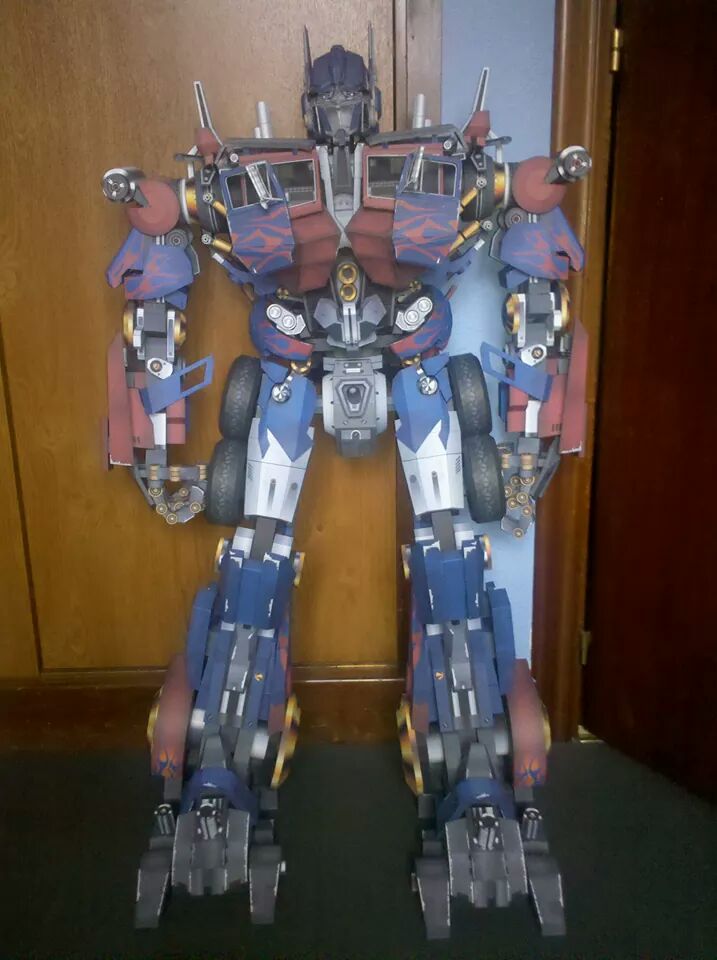
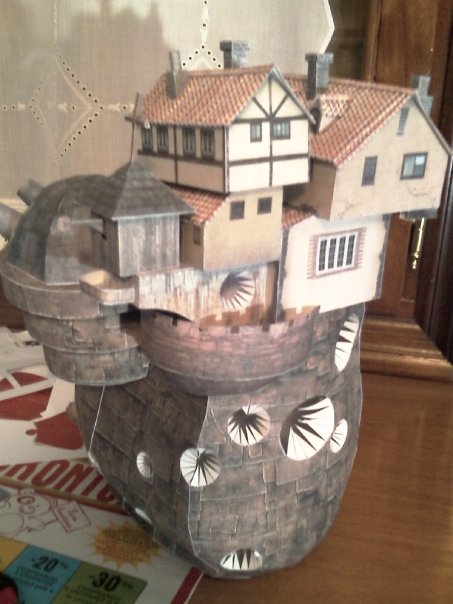
This Howl’s castle has been without a doubt the second most complex papercraft that the subscriber has done, ahead of the Son Goku in real size and only behind the Optimus Prime with moving parts (yes, you can assemble fully articulated models only with paper). I have chosen this model because in addition to requiring large doses of technique and patience, I can explain an advanced technique: the rounded parts. It must be borne in mind that to complete this project, months of work will be necessary . It is not something that can be started without having practiced a lot before.
This papercraft is actually the union of many relatively independent pieces. We say relatively because although they can be mounted separately and have their own structure they will eventually be joined in their respective zones within the set. This time we started with the “face” of the castle to have a basic structure to assemble the rest of the pieces, but we could have started by making the houses, the chimneys or any other element to join once we made the main body. Although it is not appreciated in the photos the tejavana of the houses is made with a single leaf, with many folds in valley and mountain followed. There are lots of tiny pieces to paste and, in this case, also a multitude of rounded pieces such as chimneys, wheels or even the body itself. How can we make these pieces without being rigid or badly bent?
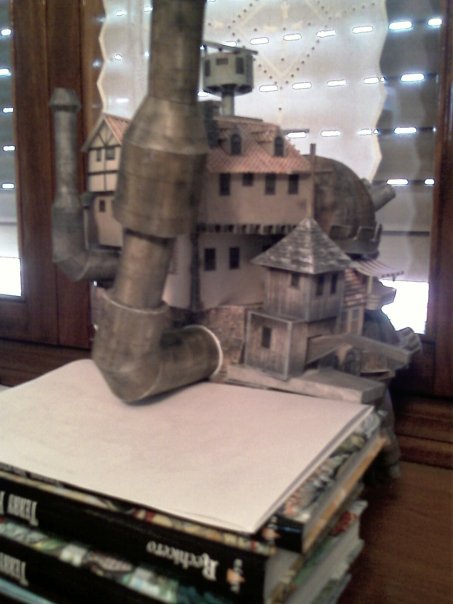
The answer is to help us with materials that are round in turn. We can “soften” the sheets of paper by making them turn on a smaller and smaller round surface until we obtain the desired curve . For the face it was enough to “rub” the piece around a bottle. For chimneys we could start with the same bottle and then move to a rolling pin (clean, clear). For smaller pieces we can start with a pen and finish with a wooden stick of the rounds. Improvise , any element can be useful.
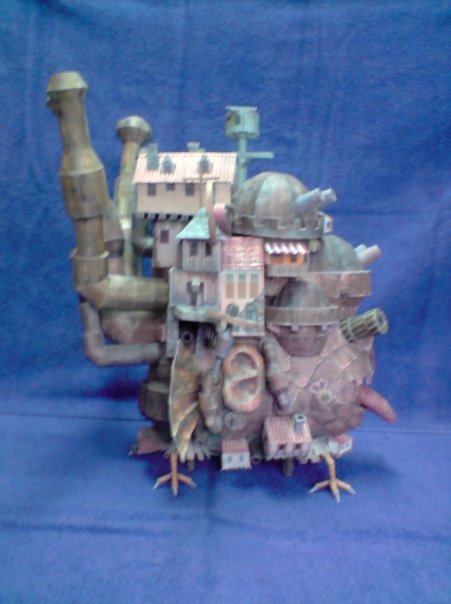
Again we must take into account the accessibility of the hands to paste certain pieces. The chimneys in particular gave me a big headache since I did not leave room to maneuver underneath. I solved the problem by accessing the joints with a punch through a tiny hole and gluing the pieces from there. If I had to do it again I would leave the bottom part without hitting it all in order to access it properly. I had to use more glue than usual to replace the “strength” of the hands and it served me well a structure that I made with books to hold the model while drying the glue.
Advanced tools and conservation
When facing these more complex papercraft, it isconvenient to have some more advanced tools in addition to the basic tools such as blades and glue. A tweezers (for tweezing) to hold small or larger pieces properly designed for holding to hold larger pieces while drying the glue are tremendously useful tools. Having elements to make varied support structures is imperative for larger papercraft . A light box for valley marking or an illuminated magnifying glass holder for smaller pieces can also come in handy (although I only use lighting in particular, the magnifying glass misleads me too much). And, before the papercraft more complex, improvisation will always be the best tool. This type of basic and not so basic material can also be found on the a4toner page.
Finally, if we want to conserve these papercraftproperly, it is best to avoid direct sunlightso you can keep colors well and, above all, keep them away from humid areas . If you are going to give a coat of some protective lacquer or Alkil better test before with a sheet (printed) in dirty: surely the colors will run or directly the model will get too wet and will spoil: better to lose a sheet than the whole model

Me dedico a la venta de impresoras, cartuchos de tinta y tóner en A4toner desde el 2009. Por suerte toco todos los días impresoras, para probar la calidad de nuestros cartuchos y para hacer análisis o review nuevos con los que ayudar a elegir la mejores impresoras a nuestros clientes . Con formación técnica y devoción ya que me encanta la impresión
La impresora a día de hoy es la herramienta mas importante de difusión libre de ideas y conocimiento, (el internet no es privado, por lo que no es libre), poder imprimir documentos con una impresora, como lo que hacían los chinos en el siglo XI A.C. con la porcelana, lo romanos con la arcilla o Gutenberg con la imprenta se convierte en algo casi Mágico a la vez que muy barato y accesible a cualquier persona.
Puedes ver mas información sobre esta empresa en: ¿Quienes somos?
- Epson Expression Photo XP-8700 | Análisis y Opiniones - 6 julio, 2022
- HP LaserJet M110we y M110w | Análisis y Opiniones - 23 junio, 2022
- HP Color LaserJet Enterprise M554dn | Análisis y Opiniones - 10 marzo, 2022